Android studio
最新版本 RabbitMQ Java客户端的当前版本是 5.5.0。
添加库依赖 在项目中使用RabbitMQ Java客户端的推荐方法是使用依赖关系管理系统。
如果您正在使用Maven,请将此依赖项添加到项目的POM文件中:
1
2
3
4
5
<dependency>
  <groupId>com.rabbitmq</groupId>
  <artifactId>amqp-client</artifactId>
  <version>5.5.0</version>
</dependency>
或者,如果使用Gradle:
1
2
3
dependencies {
  implementation 'com.rabbitmq:amqp-client:5.5.0'
}
RabbitMQ Java客户端库允许Java代码与RabbitMQ进行交互。 该库的5.x版本系列需要JDK 8,用于编译和运行时。在Android上,这意味着仅支持Android 7.0或更高版本。4.x版本系列支持7.0之前的JDK 6和Android版本。
版本请看这里:http://repo1.maven.org/maven2/com/rabbitmq/amqp-client/ 依赖请看这里:https://www.rabbitmq.com/java-client.html
代码部分
前提条件
private String userName = "dlw" ; private String passWord = "dlw" ; private String virtualHost = "/" ; private String hostName = "192.168.xx.xxx" ; private int portNum = 5672 ; private String queueName = "que" ; private String exchangeName = "demo" ; private String rountingKey = "key" ;①Rabbit配置
~~~ /** * Rabbit配置 */ private void setupConnectionFactory(){
1
2
3
4
5
6
7
8
9
10
11
12
13
14
15
16
17
18
19
20
21
22
23
24
25
26
27
28
29
30
31
32
33
34
35
36
37
38
39
40
41
42
43
44
45
46
47
48
49
50
51
52
53
54
55
56
57
58
59
60
61
62
63
64
65
66
67
68
69
70
71
72
73
74
75
76
77
78
79
80
81
82
83
84
85
86
87
88
89
90
91
92
93
94
95
96
97
98
99
100
101
102
103
104
105
106
107
108
109
110
111
112
113
114
115
116
117
118
119
120
121
122
123
124
125
126
127
128
129
130
131
132
133
134
135
136
137
138
139
140
141
142
143
144
145
146
147
148
149
150
151
152
153
154
155
156
157
158
159
160
161
162
163
164
165
166
167
168
169
170
171
172
173
factory.setUsername(userName);
factory.setPassword(passWord);
factory.setHost(hostName);
factory.setPort(portNum);
} ~~~ #### ②发消息 >①工厂创建一个新的连接 ---- factory.newConnection() ; >②用连接创建一个通道 ---- connection.createChannel() ; >③声明一个交换机 ---- channel.exchangeDeclare(String , String , Boolean) ; >④声明一个独占服务器,并得到队列名称 ---- channel.queueDeclare().getQueue() ; >⑤将交换机和队列绑定 ---- channel.queueBind(queueName , exchangeName , rountingKey) ; >⑥发布消息 ---- channel.basicPublish(exchangeName , rountingKey ,null , msg); ~~~
/**
* 发消息
*/
private void basicPublish(){
try {
//连接
Connection connection = factory.newConnection() ;
//通道
Channel channel = connection.createChannel() ;
//声明了一个交换和一个服务器命名的队列,然后将它们绑定在一起。
channel.exchangeDeclare(exchangeName , "fanout" , true) ;//声明exchange
String queueName = channel.queueDeclare().getQueue() ;//声明独占的服务器,并得到队列名
channel.queueBind(queueName , exchangeName , rountingKey) ;//将exchange和queue绑定
//消息发布
byte[] msg = "hello word!".getBytes() ;
channel.basicPublish(exchangeName , rountingKey ,null , msg);
} catch (IOException e) {
e.printStackTrace();
} catch (TimeoutException e) {
e.printStackTrace();
}
} ~~~ ###### API     #### ③接受消息 ~~~
/**
* 收消息
*/
private void basicConsume(){
try {
//连接
Connection connection = factory.newConnection() ;
//通道
final Channel channel = connection.createChannel() ;
//实现Consumer的最简单方法是将便捷类DefaultConsumer子类化。可以在basicConsume 调用上传递此子类的对象以设置订阅:
channel.basicConsume(queueName , false , "administrator" , new DefaultConsumer(channel){
@Override
public void handleDelivery(String consumerTag, Envelope envelope, AMQP.BasicProperties properties, byte[] body) throws IOException {
super.handleDelivery(consumerTag, envelope, properties, body);
String rountingKey = envelope.getRoutingKey() ;
String contentType = properties.getContentType() ;
String msg = new String(body) ;
long deliveryTag = envelope.getDeliveryTag() ;
Log.e("TAG" , rountingKey+":rountingKey") ;
Log.e("TAG" , contentType+":contentType") ;
Log.e("TAG" , msg+":msg") ;
Log.e("TAG" , deliveryTag+":deliveryTag") ;
channel.basicAck(deliveryTag , false);
}
});
} catch (IOException e) {
e.printStackTrace();
} catch (TimeoutException e) {
e.printStackTrace();
}
} ~~~ ###### API  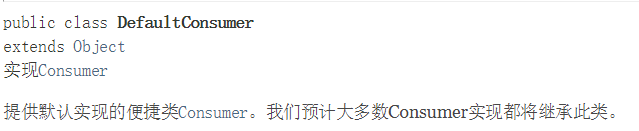   #### 测试  #### 完整代码 ~~~ public class RabbitTwo_Activity extends AppCompatActivity {
private String userName = "dlw" ;
private String passWord = "dlw" ;
private String virtualHost = "/" ;
private String hostName = "192.168.xx.xxx" ;
private int portNum = 5672 ;
private String queueName = "que" ;
private String exchangeName = "demo" ;
private String rountingKey = "key" ;
ConnectionFactory factory = new ConnectionFactory() ;
@Override
protected void onCreate(@Nullable Bundle savedInstanceState) {
super.onCreate(savedInstanceState);
setContentView(R.layout.activity_rabbittwo);
setupConnectionFactory();
new Thread(new Runnable() {
@Override
public void run() {
basicPublish();
}
}).start();
new Thread(new Runnable() {
@Override
public void run() {
basicConsume();
}
}).start();
}
/**
* Rabbit配置
*/
private void setupConnectionFactory(){
factory.setUsername(userName);
factory.setPassword(passWord);
factory.setHost(hostName);
factory.setPort(portNum);
}
/**
* 发消息
*/
private void basicPublish(){
try {
//连接
Connection connection = factory.newConnection() ;
//通道
Channel channel = connection.createChannel() ;
//声明了一个交换和一个服务器命名的队列,然后将它们绑定在一起。
channel.exchangeDeclare(exchangeName , "fanout" , true) ;
String queueName = channel.queueDeclare().getQueue() ;
channel.queueBind(queueName , exchangeName , rountingKey) ;
//消息发布
byte[] msg = "hello word!".getBytes() ;
channel.basicPublish(exchangeName , rountingKey ,null , msg);
} catch (IOException e) {
e.printStackTrace();
} catch (TimeoutException e) {
e.printStackTrace();
}
}
/**
* 收消息
*/
private void basicConsume(){
try {
//连接
Connection connection = factory.newConnection() ;
//通道
final Channel channel = connection.createChannel() ;
//实现Consumer的最简单方法是将便捷类DefaultConsumer子类化。可以在basicConsume 调用上传递此子类的对象以设置订阅:
channel.basicConsume(queueName , false , "administrator" , new DefaultConsumer(channel){
@Override
public void handleDelivery(String consumerTag, Envelope envelope, AMQP.BasicProperties properties, byte[] body) throws IOException {
super.handleDelivery(consumerTag, envelope, properties, body);
String rountingKey = envelope.getRoutingKey() ;
String contentType = properties.getContentType() ;
String msg = new String(body) ;
long deliveryTag = envelope.getDeliveryTag() ;
Log.e("TAG" , rountingKey+":rountingKey") ;
Log.e("TAG" , contentType+":contentType") ;
Log.e("TAG" , msg+":msg") ;
Log.e("TAG" , deliveryTag+":deliveryTag") ;
channel.basicAck(deliveryTag , false);
}
});
} catch (IOException e) {
e.printStackTrace();
} catch (TimeoutException e) {
e.printStackTrace();
}
}
}
~~~